The process of your leg moving away from the midline is referred to as hip abduction. Your leg moves away from the body’s midline when you walk, stand, or get involved in other workouts involving the hips and legs. The muscles used when the hips get abducted are the gluteus minimus, tensor fasciae latae, and gluteus medius. Abductor exercises at home strengthen these muscles.
Some of the exercises that workouts your abductor include:
- Side lunge
- Leg side circles
- Hip drop with step
- Seated hip abduction
- Side plank hip abduction
- Floor-sliding mountain climbers
- Pigeon Pose
- Clamshells
- Straight-Leg Raise
- Psoas holds
Below, I will not only guide you on how to do each of these abductor exercises, but I will also tell you the benefits you should expect. So, read to the end.
Abductor Exercises At Home: DIY!
One of the reasons you should try all of the abductor exercises at home is because they strengthen your hips and prevent any injury when walking, working out, dancing, etc. Of course, these are not the only benefits you should expect during and after doing the abductor exercises. There are others (more on that later). Let me help you do these simple yet effective exercises to prevent hip injury.
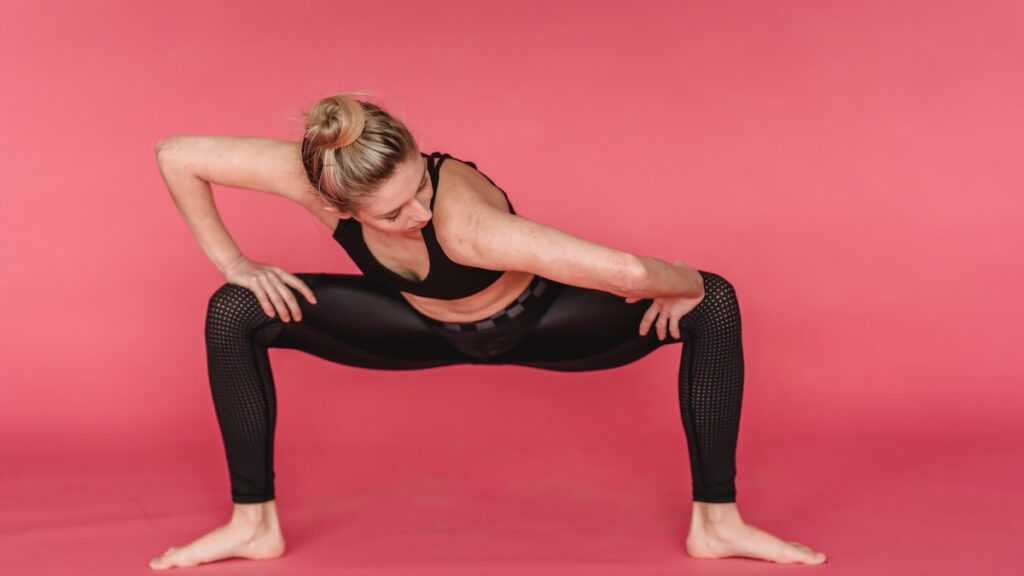
Side Lunges
Side lunges work the hips, and they are suitable for strengthening them. Other areas that benefit from this workout include the inner thighs and the glutes. Here is how to do them.
- Stand straight with the feet shoulder-width apart and ensure the core is tight.
- Stretch your left leg to the left as far as possible as you lower your butt.
- While moving your left leg to the side and your butt down, move your hands in front of your chest and then move them back to your sides when you get back to your initial standing position.
- Return to your original position and repeat the exercise using the right leg.
The rule of thumb when doing this exercise is that your toes (both legs) should face forward. Also, when going up, remember to inhale but exhale when going down.
Leg Side Circles
The primary benefit of leg circles is strengthening the hip muscles. However, if you are also looking for a 1-hour Workout to improve your body balance and coordination as well as build strength without lifting weights, do leg side circles.
Here is the best way to do leg-side circles professionally.
- Place your high-quality workout mat on the floor.
- Lie on the mat and ensure that your head is on either the right or left hand based on the side you are facing.
- If lying on the left side, you should lie on your left hand and lift your right leg.
- Begin rotating the right leg to make circles and ensure it is directly above your body.
- While working out, breathe regularly and avoid bending/curving your body
- Repeat the exercise about 5 to 10 times before turning to the right so as to work out the left leg
Hip Drop With Step
One of the primary benefits of hip drops is strengthening the gluteal muscles in your hips. Resultantly, your hips, knee, and back could be safe from injuries, even when you do lower or upper body workouts. Besides, the gluteus medius, the muscle used in hip drop workouts, becomes stronger, improving mobility and stability.
How should you do the hip drop with step workout to reap its benefits? Find out below.
- Stand straight on the ground.
- Inhale and lift your left foot into the air so that it assumes a curve while it is hanging in the air.
- The right foot should remain planted on the ground.
- Pull through the glutes of the right leg and drop using the left (hanging leg) from your hips.
- Repeat the exercise 3 to 5 times or as you wish before interchanging the legs.
Caution: If you experience irritations on the left lower back (the hanging leg side), rest to avoid stressing the muscles along that area.
Seated Hip Abduction
The seated hip abduction works out the tensor fascia latae, gluteus medius, and gluteus minimus. Nevertheless, a seated hip abduction machine is not good for you; instead, use a rubber band.
Here is how the experts do the seated hip abduction exercise.
- Sit on a chair or stool and place a band slightly below your knees.
- Move your feet apart (shoulder width) so as to stretch the band to prevent it from falling from your knees.
- Ensure that your toes are pointing forward.
- Keeping the ribs properly tucked down and the pelvis well tucked under, move your legs concurrently away from each other (right leg to the right side and left leg to the left side) and then resume the initial position.
- Repeat the workout as many times as you wish
- To ensure that you are not drawing strength from your hands, place them on your shoulders, the right hand touching the left shoulder and vice-versa.
Side Plank Hip Abduction
Like the seated hip abduction, side plank hip abduction works out the gluteus medius and activates it. In addition, side plank hip abduction activates the outer thigh, also known as the tensor fasciae latae.
So, some benefits of side plank hip abduction are helping your hip joints and the knee to remain stable through working out and strengthening the tensor fasciae latae and gluteus medius muscles.
Do you want to learn how to do the side plank hip abduction? Keep reading.
- Place a top-quality, thick workout mat on the floor and lay on one side.
- Gaining support from one hand and leg (right hand and leg or left hand and leg), place the top hand on your hip.
- While in that position, lift the top leg up and then back
- Keep moving the leg up and back at least 4 to 7 times
- Turn to the other side and repeat the exercise and then rest
Floor-Sliding Mountain Climbers
If you love climbing mountains, you do not have a reason not to try this workout. It will revive those good days you enjoyed while climbing mountains as you keep your body strong and healthy.
Slider mountain climbers work the anterior muscles of the chest, shoulder, abdominal, triceps, and serratus. Since floor-sliding mountain climbers work out numerous muscles, they have many benefits, such as strengthening the back, shoulders, legs, arms, and core.
Also, if you have been wondering what the best 2-week exercise to lose belly fat at home is, consider floor-sliding mountain climbers because they are effective at it. In fact, in only 30 days, you can lose belly fat by doing at least 4 sets of 100 mountain climbers a day. Too exciting? Let me guide you on how to do a floor-sliding mountain climber workout. It is one of the best abductor exercises at home.
A smooth floor is needed to do this workout effectively. Nevertheless, if you do not own one, you can still do the exercise. How? You can always improvise; a towel is a great thing to use. On the other hand, if you have a smooth floor but not sliders, fold two different towels and place each under each foot.
Now, let us get to the task.
- Place the sliders apart (hip-width) on your smooth floor (or the towel)
- Stand on your four (legs and hands) and place the sliders (or towels) directly under each foot (right foot on the right slider and left foot on the left slider).
- Maintain a good posture before starting: Your feet should be hip-width apart while both hands are directly beneath the shoulders. In addition, let your shoulders stay locked down and back. In addition, the spine should maintain a neutral position while the face looks straight at the floor.
- While in that position, move the right leg (or left) up to the farthest point possible
- Move the right leg to its initial position, then the left one up to the farthest possible position.
- Keep moving the legs faster (one at a time as you interchange them) as many times as possible.
Pigeon Pose
Suppose you are looking for another hip workout to add to your abductor exercises at home. In that case, the pigeon pose will not let you down, and here is why: Pigeon pose is good for improving the range of motions in your hips because it workouts the hip flexors, piriformis muscles, and glutes.
Not only that, but the pigeon pose also strengthens the lower back muscles and the hip muscles. Whenever you stretch while doing the pigeon poses, the tendons and the lower back muscles also get worked out, lowering your lower back pain (if any).
Here is the best and right way to do pigeon poses.
- Place a good workout mat on the floor to ensure you are comfortable.
- Get on the down dog position so your toes are tucked while your hips move back.
- Move the right (or left) leg towards the ceiling and bring it back so the knee moves behind your right wrist while its foot stays behind your other hand (the knee should be outside your hip).
- While in that position, let the left leg slide all the way directly behind you as far as you
- Get body support from your hands by placing your fingertips on the mat – ensure they are in line with your hips so as to lengthen through the spine and give you some good height.
- Untuck the toes of the left (the straightened) leg so that the toes press onto your mat.
- Exhale gently as you carefully crawl forward to the end of the mat using your fingers.
- Gently fold forward over the shin of your right leg and place your right hand on top of the left hand so that your head lays on top of them.
- Take several deep breaths while in that position, and then take a break.
Clamshells
Gluteus medius is the muscle commonly worked out when you do the clamshells; as a result, you can get better stability when you walk, stand, or run. So the purpose of clamshells is to strengthen the gluteus medius as well as the gluteus maximus. In addition, the clamshells help in keeping your hips moving.
Whether you want to do the clamshells on the bed or your usual mat, go ahead; the benefits reaped are the same. So, how do you do clamshells?
- Lay down on your mat (or bed) and place a cushion or one hand under your head.
- Next, bend your knees and hips and ensure the heels line with the hips and the head torso.
- Open your knees and rotate the top knee towards the ceiling without moving the top heel away from the other.
- While at it, place the top hand on your hip to ensure it remains intact (does not move back while the knee moves up).
- As the knee rotates and the hip remains in its position, the rest of the body stays intact, allowing it to relax.
- Keep moving the knee up and back as many times as you wish, then shift to the other side to rotate the other knee.
Psoas Hold
The benefit of doing psoas holds as you do other abductor exercises at home is that you will have better stability when walking or standing upright. What does that mean? The lumbar curve will be able to bear the weight above it and also transfer it.
Due to the presence of the psoas muscle, you can walk, sprint, jog, or run without any pain or strain because it creates a lumbar curve when pulling the vertebrae down and forward.
When the psoas is weak, you will likely experience pain in the pelvis and lower back. You might also develop a bad posture. This happens because the psoas muscle makes the spine round when it becomes short, weak, or tight.
This is why you should do Psoas hold workouts. So, how can you exercise the psoas muscle? It is easy!
- Stand straight and then bend your left knee (or right knee) and lift the right leg to the ceiling.
- Balancing on your right foot, and keeping your trunk tall, keep the left thigh and knee level with the hip.
- Maintain that position for at least 30 seconds before lowering the left leg slowly.
- Interchange the legs to bend the right knee as you lift the other.
- Repeat the workout as you interchange the legs.
Straight-Leg Raise
Have you been looking for the best exercises to strengthen the muscles in your hip or above the thighs? Consider doing straight-leg raises, as they are some of the best abductor exercises at home. Ss, you engage the hip flexors and quadriceps muscles whenever you do the straight leg raise workouts.
Here is an easy way to do the straight-leg raise workouts.
- Place your favorite mat on the floor and lie on your back and bend your right knee (or left knee)
- Keeping your knee straight, stretch the left leg towards the ceiling.
- While at it, ensure the abdominals are tightened to align with the left knee.
- Stay in that position for about 1 or 2 minutes before slowly lowering the right knee to its initial position.
- Repeat the workout several times before interchanging the legs.
What Are The Benefits Of Abductor Exercises?
Doing abductor exercises at home has several benefits, as seen above. This is why you should have a great workout schedule to help you try each of them. Below, I will list some of the common benefits of these workouts. You do not want to miss any of them, so keep reading.
- Strengthens the hip muscles and the gluteus medius as well as the gluteus maximus
- It helps in toning and defining the backside; hence you cannot have back pains or spinal issues.
- Improves body performance and mobility, thereby making it easy to walk, stand, jog, or dance
- Abductor exercises at home also help to relieve pain after an injury and also aids in the recovery process of the hips.
- Exercise also helps prevent injury in people who do sedentary jobs due to the extended hours they spend sitting down.
Parting Shot
Hip Abductor exercise at home can be a great way of strengthening your hip muscles and improving mobility. Resultantly, you can do any workout comfortably without any hip pains. So, walking, dancing, running, and hopping, among other workouts that involve leg movement, becomes a lot easier and pain-free.
It is, therefore, essential that you do any hip abductor workouts at home, for example, side lunges, leg side circles, hip drop with step, seated hip abduction, side plank hip abduction, floor-sliding mountain climbers, pigeon pose, clamshells, psoas hold, or straight-leg raise. Better still, follow a schedule so as to do all of these workouts at home within a month or two.
Even so, never continue to do any of the above workouts if you experience pain in your hips or other body parts. Also, you must consult with your doctor before starting these workouts so that they can confirm if you are fit to do them.